Start With the Setup That Makes Good Pizza Possible
Your home oven tops out somewhere between 500°F and 550°F. A wood-fired pizza oven runs at 800°F to 900°F. That gap explains almost everything about why homemade pizza can disappoint – and why setup matters so much before you slide anything inside.
Temperature: Go as High as Your Oven Will Allow
Crank the oven to its maximum setting. For most home ovens that's 500°F to 550°F, and every degree helps. If your oven only reaches 475°F, use it – but expect a slightly longer bake and a crust that browns more slowly. The goal is fast, direct heat that crisps the bottom before the toppings dry out.
Preheat Longer Than You Think
Thirty minutes warms the air inside your oven. It does almost nothing for a cold baking stone or steel sitting on the rack. Those surfaces need 45 to 60 minutes of heat to store enough energy to actually sear the bottom of your dough on contact. Skip this step and you get a pale, soft base no matter how good your toppings are.
Choosing Your Baking Surface
A baking steel gives the best bottom browning of any home option. It conducts heat aggressively and produces a crisp, slightly charred base close to what a commercial oven delivers. A pizza stone is slower but still far better than a pan – it draws moisture from the dough and gives a dry, crackly crust. A sheet pan works fine for beginners and produces a softer, thicker result, almost like focaccia-style pizza. Baking directly on the oven rack is an option for frozen pizza specifically – the open grate lets heat circulate under the crust and prevents sogginess.
Rack Position and the Broiler Trick
Place your steel or stone on the second-from-bottom rack. This puts the pizza close to the lower heating element without burning the base. Once the top looks pale but the crust is nearly done, switch the broiler on for 60 to 90 seconds. Watch it constantly. That short blast finishes the cheese and gives the top some color without overcooking everything else.
Frozen pizza follows slightly different rules. Most brands cook better on the middle rack where heat is more even, and some actually recommend the oven rack directly – check the box before defaulting to a stone.
Match Your Method to Frozen and Homemade Pizza
Not every pizza needs the same approach. The right baking method depends on what you're working with – and getting that wrong is one of the most common reasons pizza comes out soggy, underdone, or just disappointing.
Frozen Pizza: Read the Crust Before You Read the Box
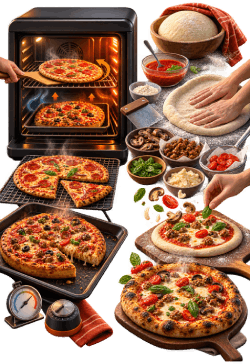
Thin-crust frozen pizzas do best baked directly on the oven rack. The direct heat circulates underneath and crisps the base quickly. A pan traps steam and turns that crust soft. Thick-crust varieties are different – they need a pan or a preheated baking sheet to support the dough while the center cooks through without burning the edges.
Topping load matters too. A heavily loaded frozen pizza placed directly on a rack risks toppings dripping and the center staying cold. A lightly topped thin crust? Rack all the way.
Manufacturer instructions are a starting point, not gospel. Most are calibrated for an average oven running slightly cool. If your oven runs hot, drop the temperature by 25°F and check a few minutes early. A pale, floppy crust means more time. Dark edges with a raw center means your oven has a hot spot – rotate the pizza halfway through.
Homemade Pizza: Dough Readiness Changes Everything
Dough that hasn't proofed properly bakes dense and tough. Proofing just means letting the dough rise long enough for fermentation to do its job – that's the process where yeast produces gas and flavor. Under-proofed dough resists stretching and springs back aggressively. Properly proofed dough feels soft, slightly puffy, and gives easily when you press it.
Shaping matters more than most people expect. Press from the center outward, leaving the rim untouched so it puffs up during baking. Torn centers usually happen when dough is too cold – let it sit at room temperature for 30 minutes before you start.
Go lighter on sauce than feels right. A thin, even layer is enough. Wet toppings – fresh tomatoes, mushrooms, raw sausage – release water during baking and make the crust soggy. Drain them, pre-cook them, or skip them. Overloading also blocks heat from reaching the dough, so keep toppings sparse and evenly spread.
Use Heat, Timing, and Visual Cues Instead of Guesswork
A timer is a starting point, not a verdict. Knowing when your pizza is actually done means reading the oven, not just watching the clock.
What "Done" Actually Looks Like
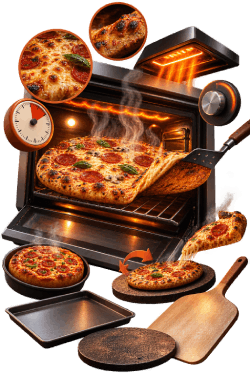
Check the cheese first. You want it fully melted, bubbling, and showing some brown patches – not pale and rubbery. The rim should have puffed up and taken on some color, anywhere from golden to lightly charred depending on your style. Lift the edge with a spatula and look underneath. The base should be firm and deeply golden, with no soft or floury patches. If it bends and feels damp, it needs more time regardless of what the clock says. A set center with no jiggle and a crisp underside are your real signals.
Timing Ranges for Different Styles
Thin homemade pizza on a preheated baking steel or stone typically takes 6 to 9 minutes at 500°F or higher. Thicker homemade pizza, like a pan-style or Sicilian, usually needs 15 to 20 minutes at around 450°F. Common frozen pizzas generally fall between 12 and 18 minutes depending on thickness and brand – but always start checking at the lower end. These are flexible guides, not rules. Every oven runs differently, and your pizza will tell you more than any box instruction.
Rotating, Launching, and Switching to Broil
Halfway through the bake, rotate the pizza 180 degrees. Most home ovens have hot spots, and rotating prevents one side from burning while the other lags behind. Use a pizza peel or the back of a flat baking sheet to do this safely without pulling the rack all the way out.
If your cheese isn't coloring but the base is nearly done, switch to broil for 60 to 90 seconds. Stay at the oven – broil works fast and can go from perfect to scorched in under a minute. This trick is especially useful for frozen pizzas, which often underbrown on top.
Fix the Mistakes That Ruin Home-Baked Pizza
Most pizza problems have simple causes. Once you know what to look for, fixing them is mostly a matter of adjusting one thing at a time – then repeating what works. Work through these common failures like a checklist.
Pale, Soft Crust
Your oven probably wasn't hot enough, or your baking surface hadn't fully preheated. A baking steel needs at least 45 to 60 minutes at your oven's maximum temperature – usually 500°F to 550°F – before it holds enough heat to properly brown the bottom. Rack position matters too. Move the pizza to the top third of the oven and finish under the broiler for 60 to 90 seconds.
Soggy Middle
Too much sauce is the most common culprit. Spread no more than three to four tablespoons across a 12-inch pie. Wet toppings – fresh tomatoes, undrained mozzarella, mushrooms – release moisture as they cook and turn the center soft. Pat everything dry before it goes on the pizza.
Burnt Bottom
Check your rack position. On a baking steel, the bottom of the pizza gets intense direct heat. If the crust is charring before the top is cooked, drop the rack one level and reduce time on the steel by a minute or two.
Dry, Rubbery Cheese
Cheese that goes on too early dries out before the crust finishes. Add mozzarella at the two-thirds mark of baking, or pull the pizza out slightly early and let residual heat finish it off the steel.
Gummy Dough
Cold dough straight from the fridge doesn't cook evenly. Let it rest at room temperature for at least 30 minutes before shaping. Gummy texture can also mean underbaking – trust a thermometer over the clock.
Pizza Sticking to the Peel
Use semolina flour, not regular flour, on your peel. Build the pizza quickly and give the peel a shake every 30 seconds to confirm it's still moving freely. If it sticks before launch, gently lift the edge and add more semolina underneath.
Toppings Sliding Off
Cutting too soon is usually the problem. Give the pizza a full two minutes to rest before slicing. The cheese needs time to set, otherwise everything shifts the moment the knife hits it.
Build a Simple Pre-Bake Routine for More Consistent Results
Better pizza becomes much easier when you stop making decisions after the dough is already stretched. A short routine before every bake helps you control temperature, moisture, timing, and topping balance. It also makes troubleshooting easier because you can tell which variable changed when one pizza turns out differently from the last.
- Bring the dough to room temperature: Cold dough is harder to stretch and may bake unevenly. Give refrigerated dough at least 30 minutes to relax before shaping, and longer if the center still feels noticeably cold.
- Preheat the oven and baking surface completely: Set the oven to its highest practical temperature and give a stone or steel 45 to 60 minutes to absorb heat. Putting pizza onto a surface that is only partially heated almost guarantees weaker bottom browning.
- Prepare toppings before shaping: Drain mozzarella, pat vegetables dry, cook meats that require pre-cooking, and portion the sauce before stretching the dough. Once the pizza is on the peel, you want to work quickly so moisture doesn't soak into the base.
- Keep the topping layer light: More toppings do not automatically produce better pizza. Excess sauce, cheese, and vegetables insulate the dough and release moisture. Leave visible gaps between ingredients so heat can reach the surface.
- Check that the pizza still slides: Give the peel a gentle shake before opening the oven. If the dough moves freely, it should launch cleanly. If part of it sticks, lift that edge carefully and add a small amount of semolina underneath.
Once the pizza is baking, stay close enough to react. Check it earlier than your expected finishing time, rotate it if one side is browning faster, and use the broiler only when the base is nearly finished. Consistency comes from repeating the same preparation steps and making small adjustments rather than changing several things at once.
Great Pizza at Home Comes Down to Control
Nail a few fundamentals consistently and the results will genuinely surprise you. A screaming-hot oven, a preheated baking surface, toppings applied with restraint, and the habit of actually watching your pizza as it bakes – those four things matter more than any single piece of equipment you could buy. Frozen or homemade, the same principles apply. Read the crust color, trust the process, and adjust as you go. Your next pizza can be noticeably better than your last, and you already have everything you need to make that happen.